

How to Set-Up Your Artwork Files
Verification
Open the dieline that PakFactory has provided in Adobe Illustrator and verify the job information at the bottom to indicate your desired effects and Pantone colors accurately.
Layer Set-Up
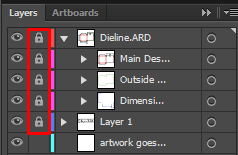
Open your ‘Layers’ window by going to Window > Layers.
Check to make sure that all layers except for ‘Artwork’ are locked to prevent the dieline and information panel from being altered.
Placing Artwork
Before you begin working on your artwork, it is MANDATORY that you follow our General Artwork Guideline or Artwork Guide Digital Corrugated for digital corrugated boxes.
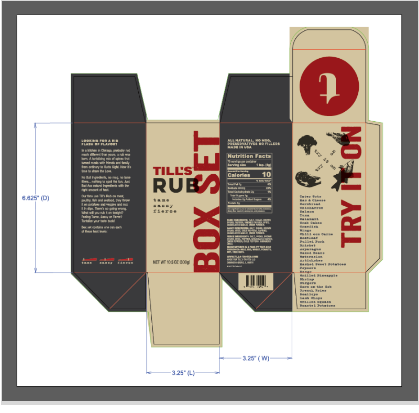
Artwork can be created directly on the dieline or transferred from another file.
Make sure to include bleeds if you do not want white borders on the edges of your boxes.
If you want to include a white border, make sure your artwork does not surpass the cutting line.
How to Get Two-Sided Printing
You will need two separate dielines (PakFactory will provide the two dielines) using one for your outside artwork and the other for the inside artwork.
Follow the abovesteps on how to set-up your artwork files for both your artwork files.
When sending both files to PakFactory, make sure to indicate which dieline is for outside and inside printing along with the font files
(example: filename_exterior.eps & filenane_interior.eps or filename_exterior.pdf & filename_interior.pdf)


0 Comments